

KEEP YOUR VINYL PLAYING CRISP AND CLEAN
Taking care of your records is paramount, making sure they are clean and well stored will mean you getting years of play out of your precious collection, but how do you do this on a budget? We’ve done some research and for around £70 you can get yourself a decent set up that will get your recording collection looking and sounding great.
WHAT DO I NEED?
To get started you need to get the Knosti record cleaning kit, it’s currently on Amazon for less than £40 and has been hailed as “The best manual record cleaner out there” by thevinylfactory.com. Unfortunately, the immediate downfall of the Disco Antistat (known as the ‘Knosti’ elsewhere) is that, straight out of the box, it doesn’t perform that well. The fluid is bad for your stylus (we’ll show you how to make your own fluid for a fraction of the cost), the funnel and filter pads are no well designed, and the instructions aren’t thorough enough. On the other hand, the cleaning bath/trough is great, the clamp protects the labels, and the rack is well designed in that the support pads don’t touch the record’s grooves.

In addition to the Knosti, you’ll need these which you can pick up very cheap online:
- 2 large lint free microfibre cloths. The more the better, make sure they’re at least 12″ square. Test them on a CD case to make sure they don’t scratch.
- 5L of distilled (de-ionised) water.
- 1 empty bottle with a spray-gun attachment.
- 1 measuring jug.
- 1 Y-shaped funnel.
- 1 pack of unbleached coffee filters.
- 1 carbon fibre brush.
You’ll also need poly-lined inner sleeves and, most importantly, a home-made record cleaning solution. There are various types of mixtures people recommend but we’ve found this one works well:
MAKING YOUR OWN SOLUTION
- 700ml lukewarm water
- 2 drops of washing-up liquid
- 1 cap of distilled malt vinegar.
Pour the fluid away and make up a new jug for every batch of 15 records, If you don’t want to make it yourself, get Plane Groovy’s ‘Vinyl Clear‘.
METHOD
Use a clean area with lots of light, I find the kitchen is a good place. Wash your hands.
1. Clean the record on the spinning turntable with the carbon fibre brush to remove excess surface dust. Check YouTube for instructions on how to correctly use these brushes.
2. Following the Knosti instructions, fill the trough with your own solution or Vinyl Clear (you’ll need at least 500 ml to fill the trough so use the measuring jug), put the clamps on the record (not too tight, but tight enough so that liquid doesn’t run down the label), wash the record. I turn the record 20 times in one direction, then 20 times the other way.

3. Lift the record from the trough and allow the excess liquid to drip into the trough.
4. Hold the record over the sink by the still attached clamp and spray the record with distilled water at eight points per side. The idea here is to remove the solution as you don’t want any residue left over on the cleaned record. The spraying method does a surprisingly good job of jetting the solution off the record, I give it a spin over the sink to let the water go round the record. It’s important that you don’t rinse the record with tap water as it could leave mineral deposits on the record (especially if you have hard water). Some users buy a second trough from the other place and fill that with distilled water. I find the spray-gun method works fine and it’s cheaper than buying an extra trough.
5. Remove the clamps and place the record on a clean microfibre cloth on a clean flat surface. Place a second microfibre cloth over the record to create a sandwich. Press down lightly on the cloth so that the water is absorbed. Turn the record over and repeat this drying process for the other side.
Note: You should not rub the record in order to dry it, just press down with the cloth on the record and it will absorb the water.
6. Place the record in the Knosti rack for the final air dry. Be careful when putting the record on and taking it off the rack so as not to scratch it. Feel the white tips, they’re well positioned but a little sharp! You can either place balloons over the stands or tape over the white tips with electrical tape which is soft and won’t scratch your record if it makes contact.
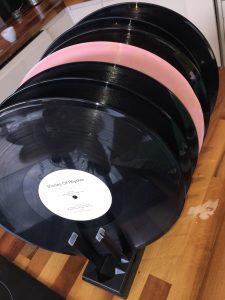
Repeat steps 1-6 until you have filled the rack. It will hold seven records. Once you’ve placed the seventh record on the rack, the first record should be completely dry.
NOW YOUR VINYL IS CLEAN AND DRY
1. Carefully remove the dry record from the rack. Feel the label and outer edge of the record to check that it is completely dry. If you’ve followed the above method correctly the record should be pristine and free from dirt, fingerprints, and dust. Obviously, nothing fixes a scratch. Even brand new records will come out looking (and sounding) better.
2. Place the dry record in a new polylined inner sleeve. Keep any printed inner sleeves as they have collectible value. Bin (or sell) the old paper sleeves. There’s no point in putting your freshly cleaned record back into a dirty sleeve!
When you play your cleaned records they should only require a dry sweep with the carbon fibre brush before and after each play. You only need to perform the above wet cleaning method once per record as long as you keep your records clean.
Make sure you wash the trough out in warm water after use and let it air dry completely. Filter the Vinyl Clear back into it’s bottle via a funnel and coffee filter. Keep the Vinyl Clear in the fridge. You’ll notice the Vinyl Clear depleting gradually over time. You should always ensure that the trough’s brushes are completely submerged in Vinyl Clear (500 ml). I top up with distilled water when supplies are low. You could also consider filtering the used solution into a separate bottle, so as to keep your un-used solution free of residue. If you are using your own solution then you can simply pour this down the sink, a single batch should be enough to do up to 15 records.
CONCLUSION
This method is cheap and a bit messy, but it works so well. It’s a rather therapeutic experience and far more personal than using a record cleaning machine. Seeing second hand records, previously covered in a layer of grime, come up sparkling is very pleasing. The best thing is the sonic benefit, you can really hear the difference that a good clean makes. There is a regained sense of clarity and subtle detail, the noise floor is greatly reduced also. I wouldn’t say it’s “night and day”, but the change is quite audible.
GOT ANY TIPS FOR US THEN PLEASE LEAVE THEM IN THE COMMENTS BELOW
[Credits: R. Cowlin & Mich O’ Phull]